Simple tasks
Simple tasks
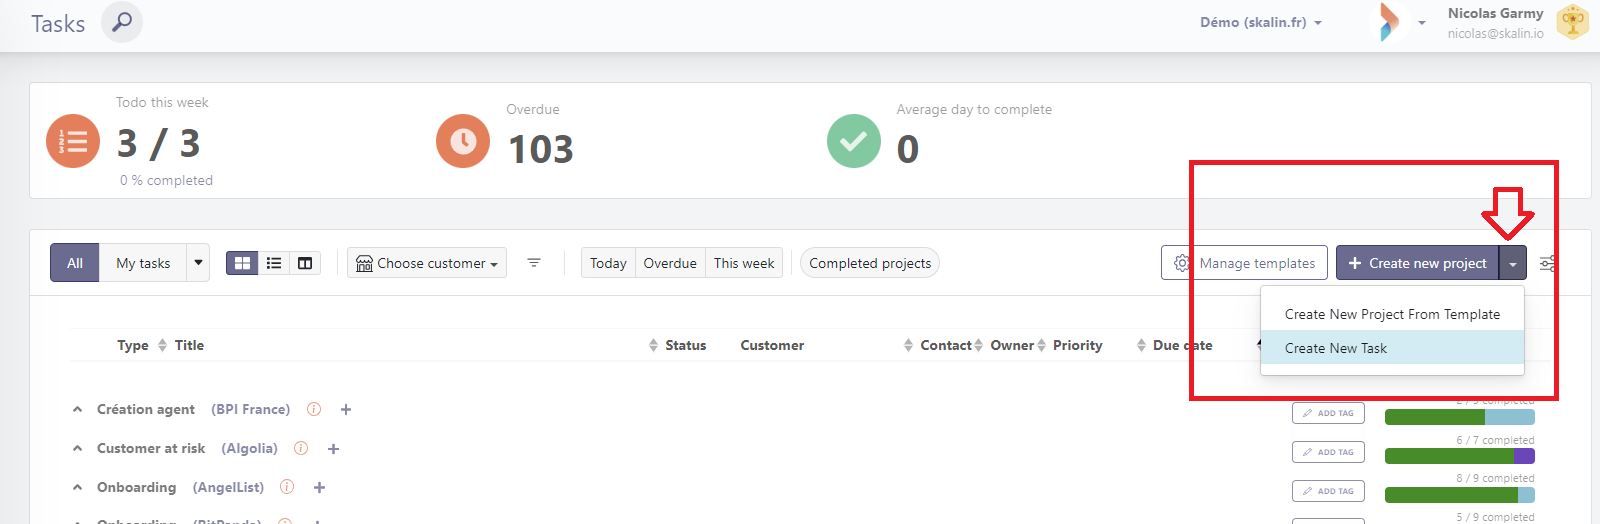
To create a simple task, go to the Activities > Tasks section of the vertical menu, click on the arrow on the right and then "Create New Task" :
A modal then opens on the right of your screen, allowing you to enter the task's characteristics:
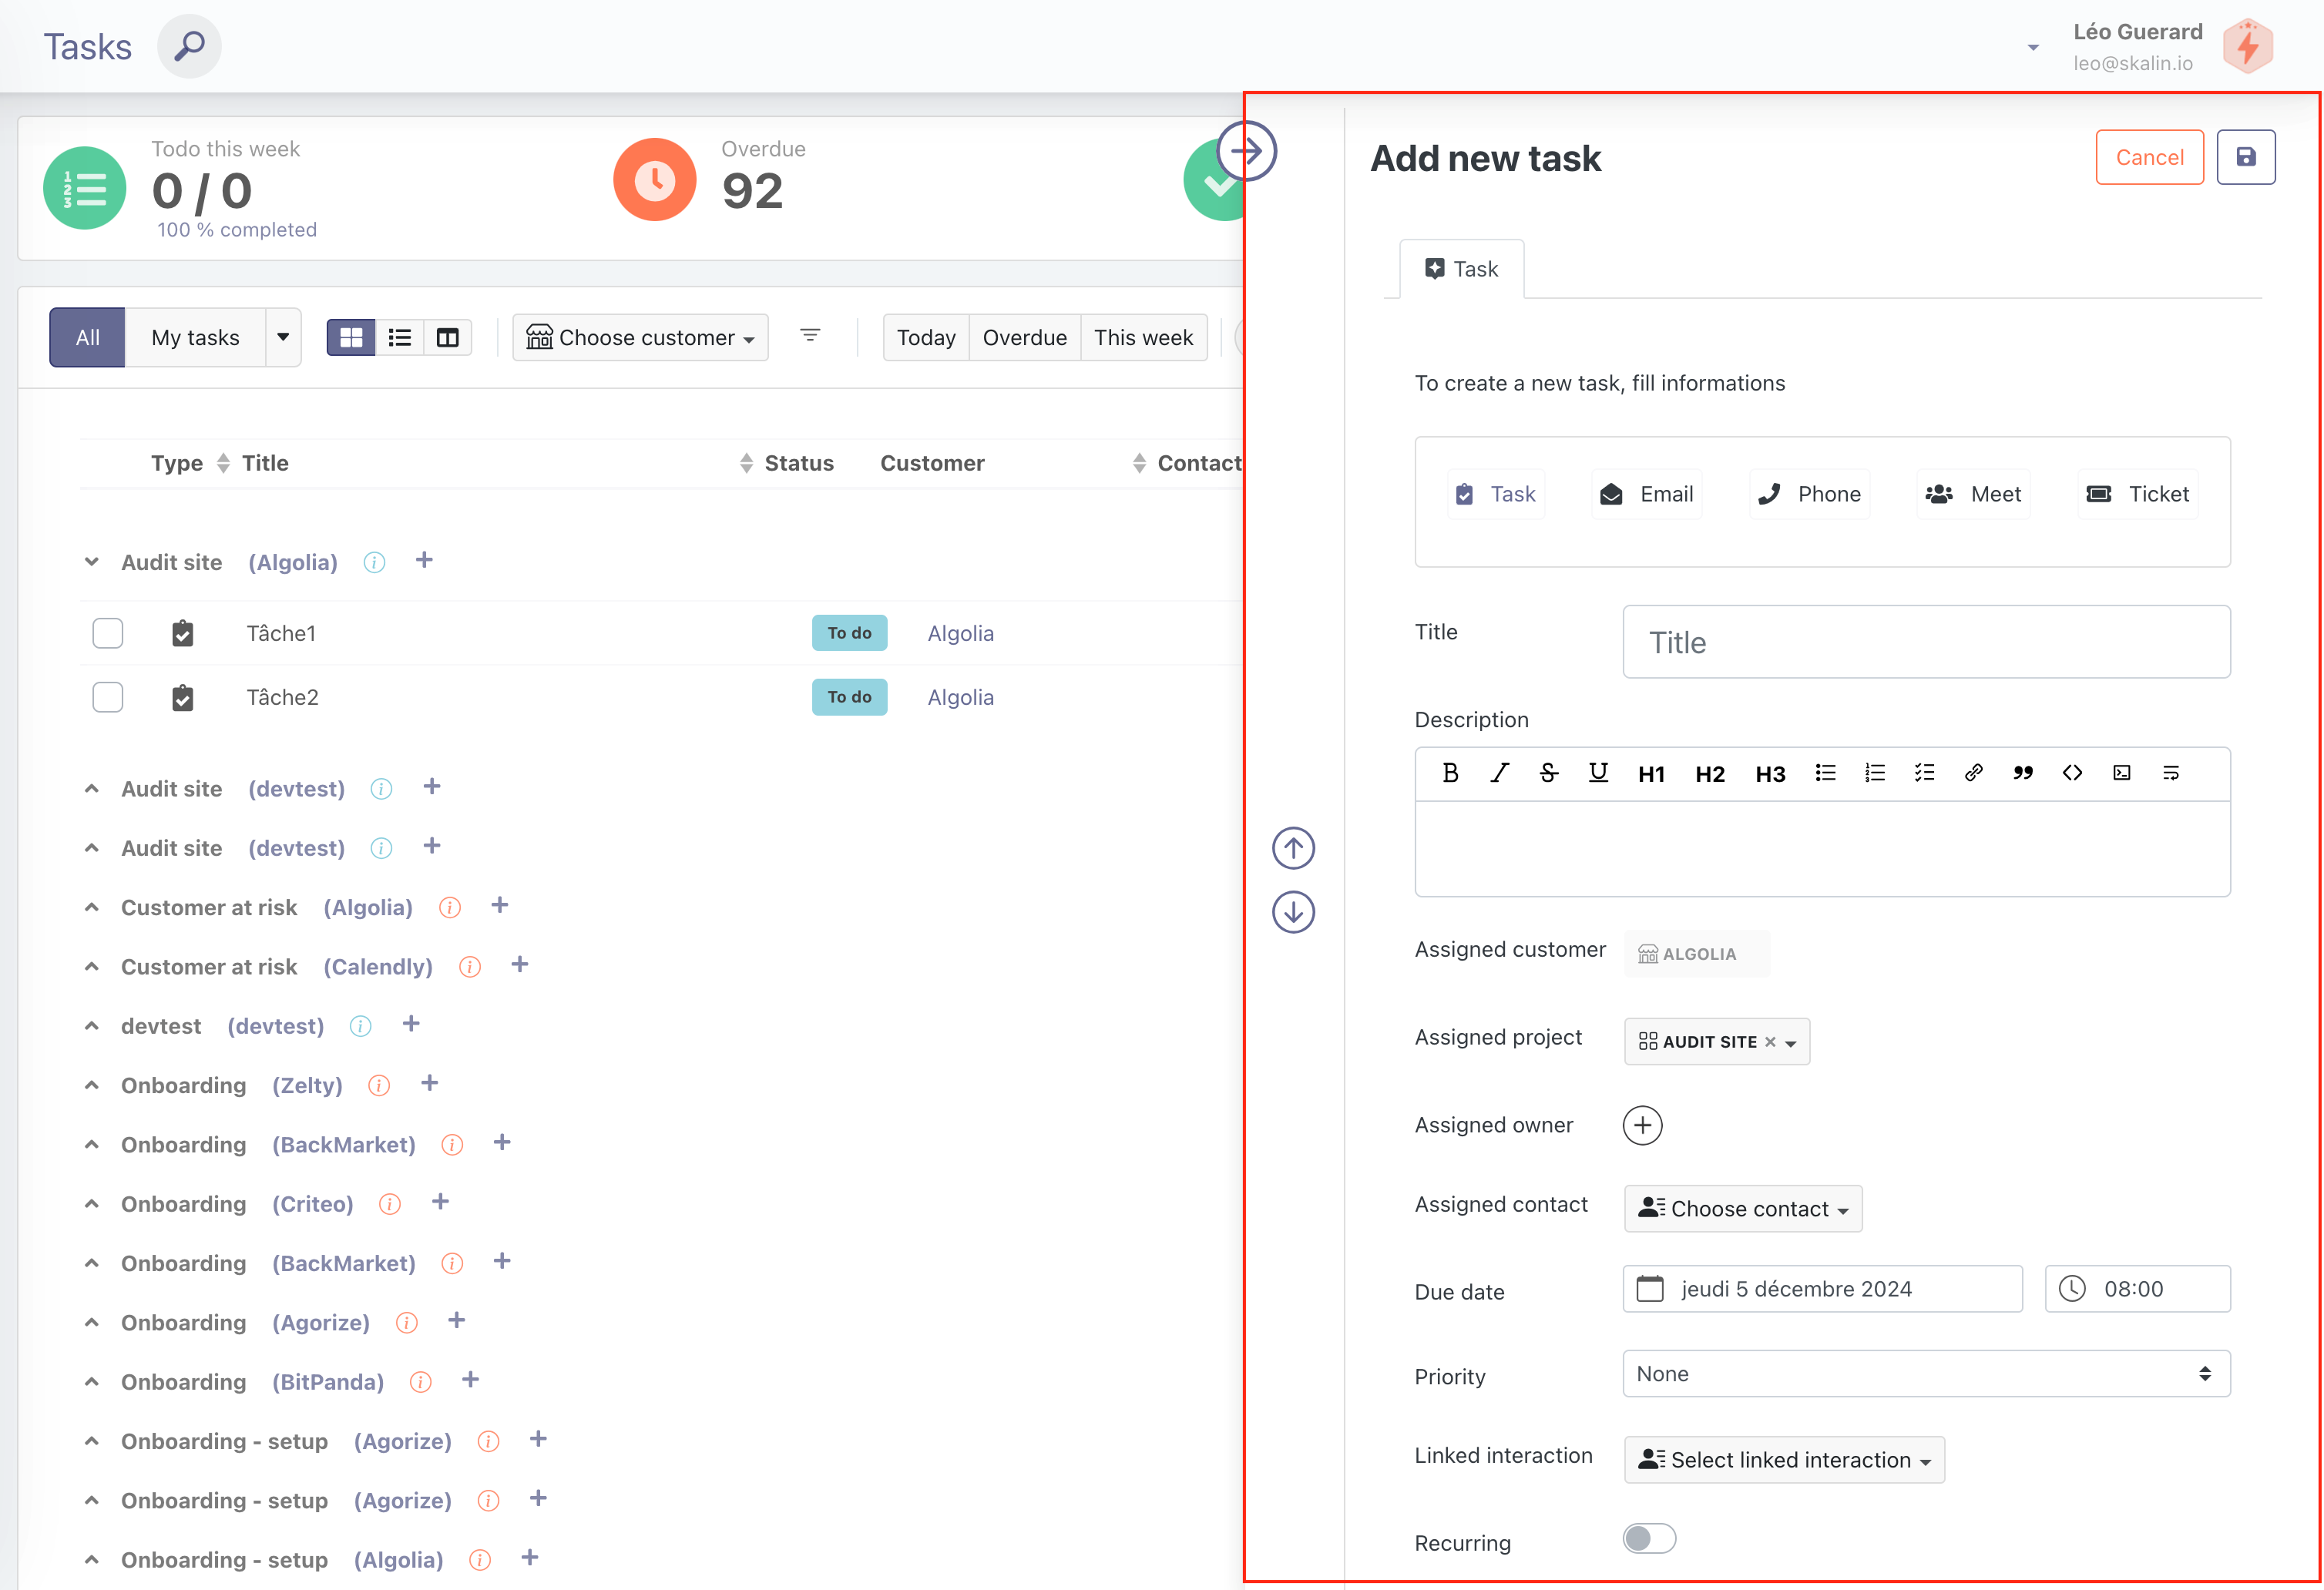
Here's what the different fields mean:
- Title: task title.
- Description: task description
- Assigned customer : links the task to a customer.
- Assigned project: links the task to a project (see Projects below).
- Assigned owner : allows assigning the task to one or more users, customizable field, or to a team.
- Assigned contact: links the task to a contact.
- Due date: deadline for delivery.
- Priority (none, low, high, critical): task priority level. By default, tasks have no assigned priority level ("none").
- Linked interaction: links the task to an interaction.
- Recurring (yes/no): allows you to program a recurrence for the task. See below. By default, tasks are not recurring.
- Reminder (yes/no): indicates whether the task is eligible for alerts. By default, this option is checked; simply deactivate it if you do not wish to receive reminders.
Nota
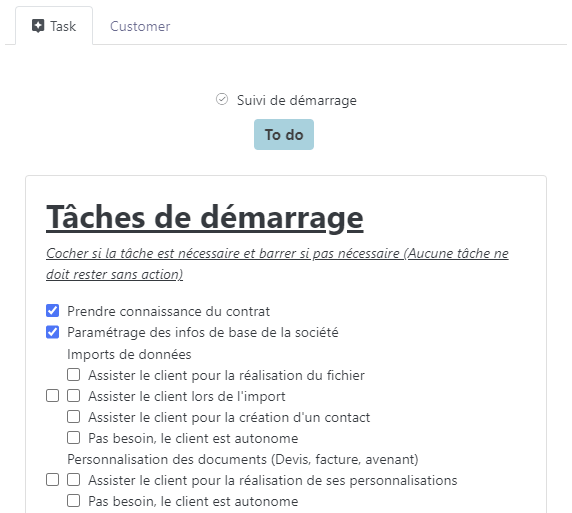
Checklist-based task descriptions work well and can be updated without having to edit the task itself!
Customer Portal
You can share your tasks and projects directly with your customers via the Customer Portal. Set the visibility of each task (portal or internal) and collaborate with your contacts in real time.
# Bulk actions (multi-selection)
The first column of the table contains a checkbox in the header row.
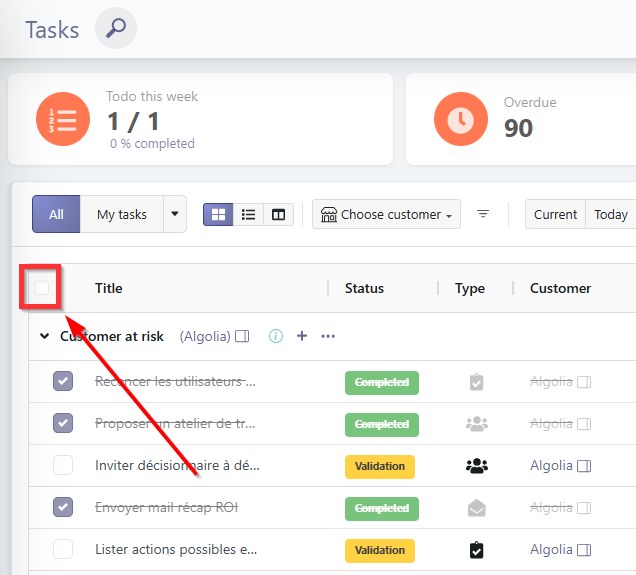
Checking it displays a checkbox next to each task, allowing you to select individual tasks or select all at once. An action bar then appears at the bottom of the list with the following actions:
- Change status: mark the selected tasks as to do, in progress, or completed
- Assign to a person: reassign the selected tasks to another user
- Add a contact: associate a customer contact with the selected tasks
- Change customer: update the customer linked to the selected tasks
- Change priority: update the priority level of the selected tasks
- Change due date: update the deadline of the selected tasks
- Delete: delete the selected tasks
Do not confuse the two checkboxes
In multi-selection mode, two checkboxes are visible on each row:
- The checkbox on the left is used to select the task for a bulk action.
- The checkbox on the right indicates whether the task is completed.
Do not mix them up.
Action bar and collapsed projects
The bulk action bar is located at the bottom of the list. If the view contains projects with tasks, you may need to scroll down to see it.
Additionally, when using the header checkbox to select all, only tasks from currently expanded projects are selected. Tasks belonging to collapsed projects are not included in the selection.
# Add a comment and notify a colleague
On each task, a comment field lets you add notes or notify a colleague using @. When a colleague is mentioned, they receive a notification in the notification center.