Key Concepts: Filters, Tags and Custom Fields
Key Concepts: Filters, Tags and Custom Fields
Filters, Tags and Custom Fields are three cross-cutting features you'll find throughout Skalin. This page explains how to configure and use them from the Customers view.
# Filters
# Introduction
The advanced filtering feature allows you to filter and refine the display in the Customer View to focus only on clients that meet specific criteria, using the available data (clients, contracts, health scores, and calculated indicators).
This is where Skalin really shines compared to a generic CRM or spreadsheet: instead of manually maintaining static lists, you can build dynamic, multi-criteria views that update automatically. This feature helps you:
- Analyze key information more precisely from the Customer View
- Prepare specific workflows or targeted actions
- Combine multiple display criteria without modifying your data
- Save filter configurations as reusable views
# Accessing Filters
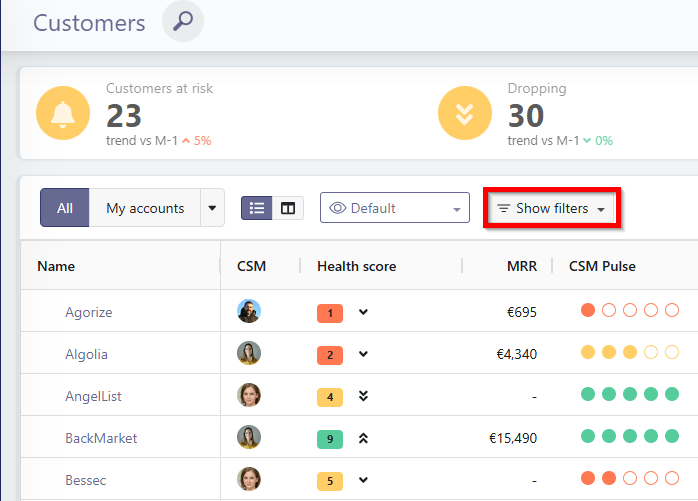
Filters are accessible from the Customer View, via the "Show Filters" button in the header.
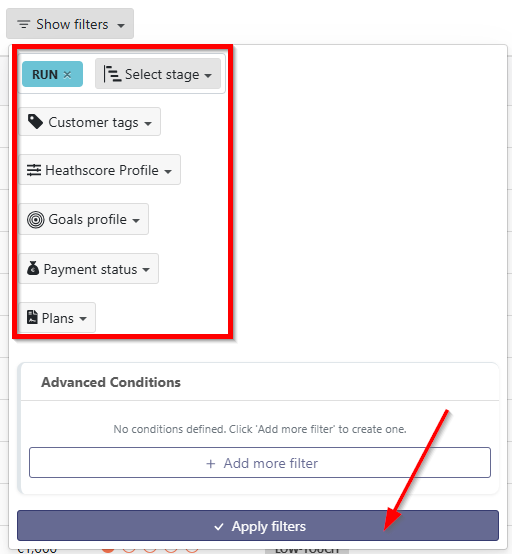
# Using Basic Filters
Some filters are available directly without advanced configuration. You can filter clients by:
- Their phase
- Their Tag
- Their health score profile
- Their interaction goals
- Their payment status
- Their plan
Click "Apply Filters" at the bottom to see the effect of the applied filter.
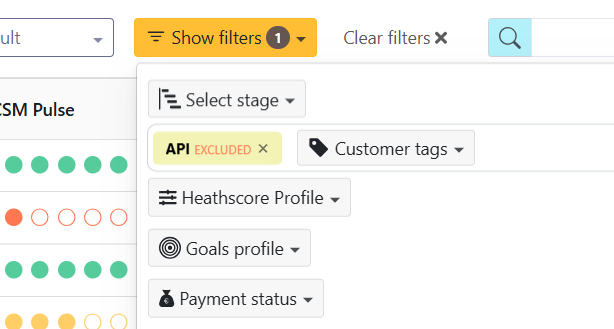
Filtering OUT some tags
Did you know that you can also filter the view to NOT see clients with certain tags? Simply hover over the label and select the "forbidden" button.
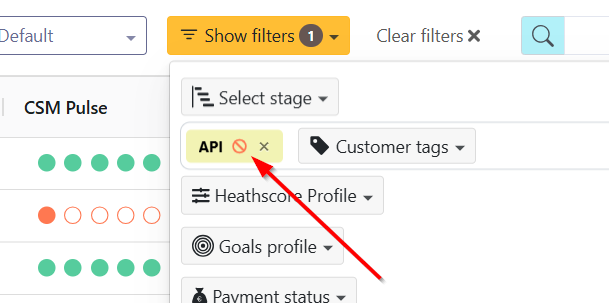
You will then explicitly see "Excluded":
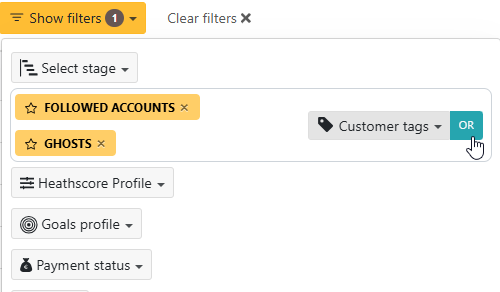
AND/OR Logic on Tags
When you select multiple tags in the basic filters, you can switch between AND and OR logic (and back) simply by clicking on the AND or OR label. Reminder: AND = only customers who have all selected tags are displayed; OR = customers who have any one of the selected tags are displayed.
# Using Advanced Filters
Advanced filters allow you to go further by creating conditions based on:
- Client properties, including custom fields
- Contract data
- Health score
- Calculated indicators (e.g., last meeting, usage over the last 30 days)
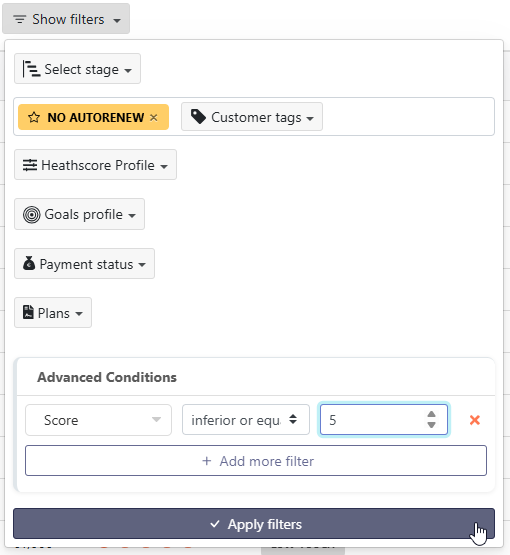
# Example 1: Clients without automatic renewal and low health score
Goal: display only clients without automatic renewal and with a health score of 5 or below.
- Apply the system filter on the No Autorenew tag
- Open advanced filters
- Select the Health Score field
- Choose the comparator inferior or equals
- Enter the value 5
- Click "Apply Filters"
Info
The health score "level" corresponds to the colors red (poor), yellow (medium), and green (good), covering value ranges from 1 to 3, 4 to 6, and 7 to 10.
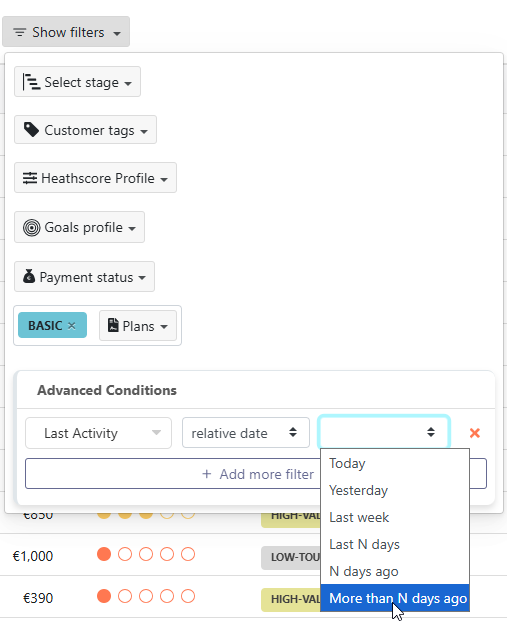
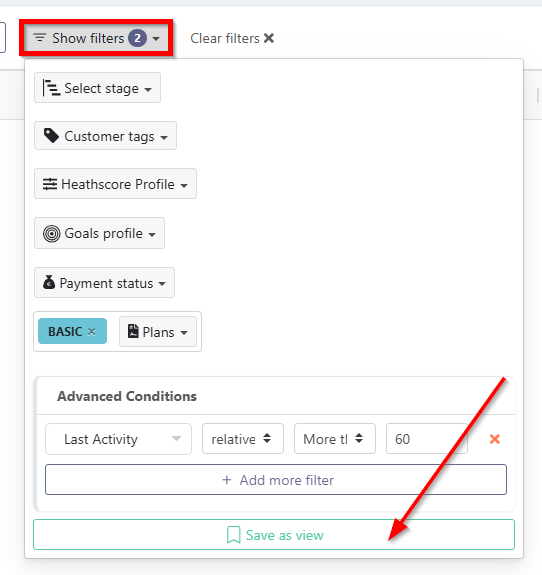
# Example 2: Combine a plan and a date filter
Goal: display only clients with the Basic plan whose last login was more than 2 months ago.
- Select the filter for the Basic plan
- In advanced conditions, choose Customer Properties > Last Activity
- Select the comparator relative date
- Choose more than N days ago
- Enter the value 60
- Click Apply Filters
The logic rule for advanced filters is always "AND": all conditions must be met for a customer to be displayed. Custom fields can also be filtered.
# Saving a View from Filters
Once your filters are applied, you can save them as a view.
- Open Show Filters
- Click Save as View (button at the bottom of the panel)
- Give the view a name
- Add a description (optional)
- Save
The view will appear to the left of the Show Filters button, under the default view.
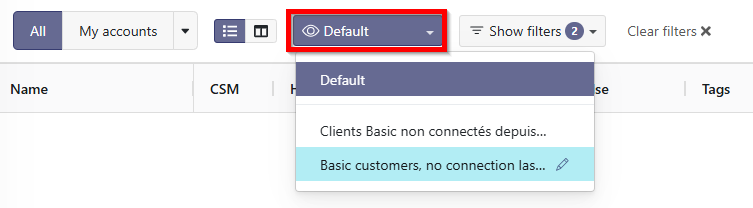
# Managing Views
Saved views can be classified according to three visibility levels:
- Personal: visible only to you. Users with the CSM role can only create views at this level.
- Team: visible to all team members. Only managers and administrators can create views at this level.
- Global: visible to all Skalin users. Only managers and administrators can create views at this level.
Regardless of your role, you cannot see personal views created by other users.
Organizing your views into folders
You can organize your views into folders by using // in the view name to create a hierarchy.
For example, the views:
- Onboarding//No usage
- Onboarding//No contact
will be displayed grouped under an "Onboarding" folder.
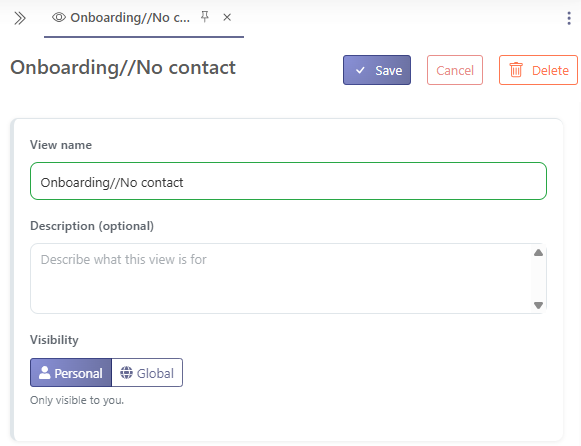

To modify or delete a view:
- Hover over the view in the list
- Click the edit icon
- Change the name, description, or filters
- Or delete the view
# Filter Persistence Across Pages
An applied filter or view remains active when navigating the menu.
For example:
- Moving from the Customers view to the Contacts view will show only contacts of the filtered clients
- Accessing the Contracts page will show only contracts of the filtered clients
The filter state is always visible in the header so you know if it is active.

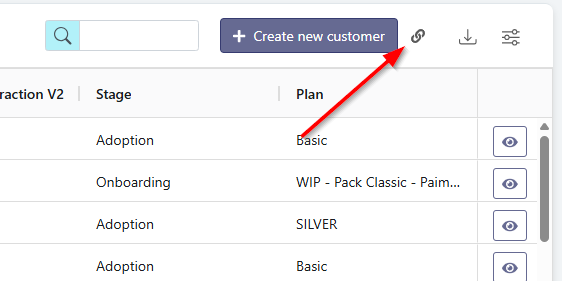
# Sharing a Filtered View
To share the URL of a filtered view, use the button located just left of the download button. The generated URL is short and already contains all applied filters.
# Best Practices
- Save recurring filters as views
- Use advanced filters to create targeted action lists
- Always check in the header if a filter is active before analyzing or exporting your data
# Tags
A CUSTOMER can be associated with one or more Tags. These Tags can then be used as filters in the "Customer tags" drop-down menu. Here you'll find both system tags and your custom tags.
# System Tags
System Tags correspond to Tags that have been calculated and updated automatically by Skalin. These are the Tags highlighted in yellow and preceded by a star.
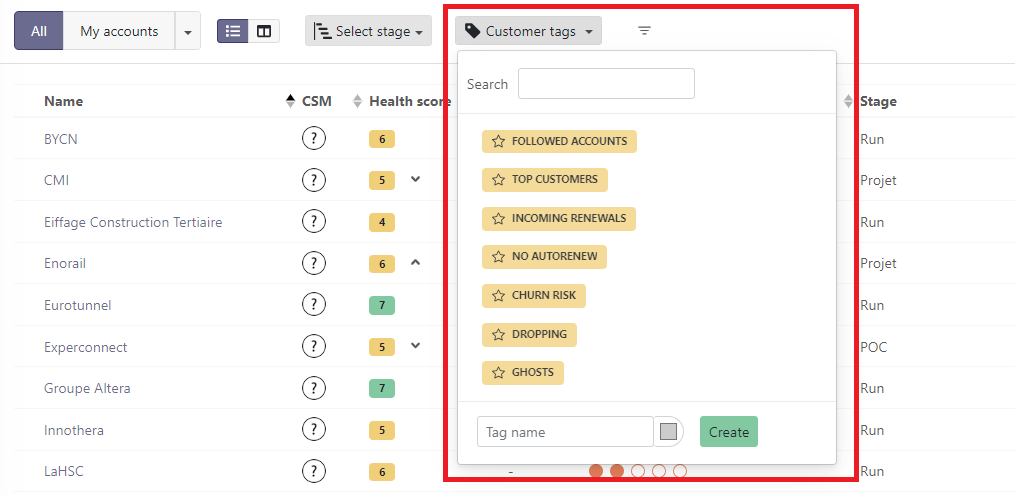
Here's what they mean:
- Followed accounts: allows you to find accounts for which you are a "Team member", without necessarily being the "owner" of the account. Note that you can modify the "Team members" in the Settings tab of each customer file.
- Top customers: corresponds to the 30% of customers who generate the most MRR.
- Incoming renewals: corresponds to customers whose notice date is less than 30 days away. For contracts with tacit renewal, the notice date is equal to the contract end date minus the notice period; for contracts without tacit renewal, the notice date is equal to the contract end date.
- No autorenew: corresponds to customers who are not subject to tacit renewal.
- Churn risk: corresponds to customers with a health score of 3 or less (red color code).
- Dropping: corresponds to customers whose health score has dropped compared to the previous week.
- Ghosts: corresponds to customers with whom you no longer interact and who have not used your product for some time. By default, this parameter is set to 30 days without incoming interactions and 30 days without a login. These settings can be changed in Settings > General (opens new window).
Tags can be accumulated. By default, if you select multiple tags, the OR logic applies: Skalin will display all accounts that meet either of the chosen conditions. You can click OR to switch to the AND logic, which will select accounts that match all the tags you selected.
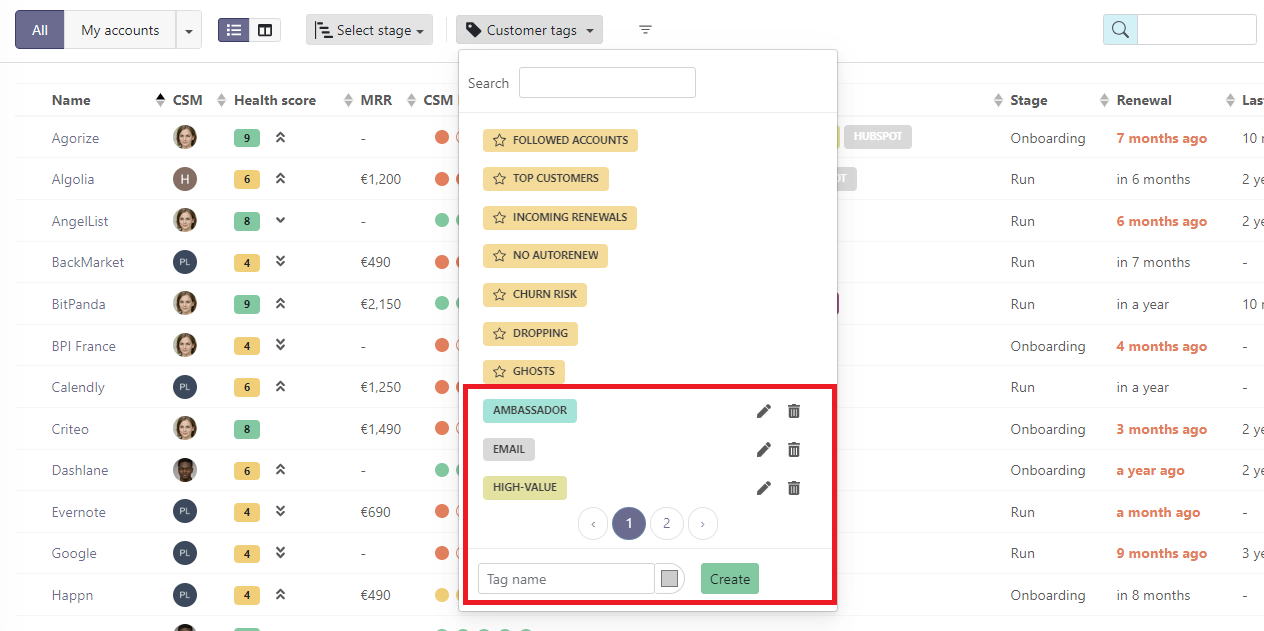
# Custom Tags
You can create your own tags by entering the tag name in the "Tag name" field, selecting a color if needed, then clicking Create.
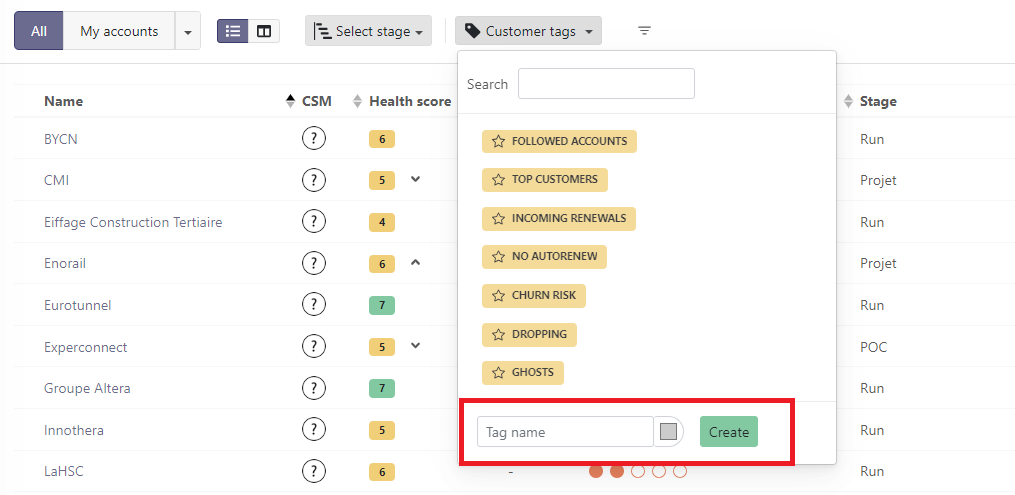
Your tags will then be visible under the list of System Tags. They work in the same way and can be combined with system tags. Unlike system tags, custom tags can be easily edited and deleted using the pictograms on the right.
# Tags or Custom Fields?
When to use a tag rather than a custom field?
If your goal is to filter certain customers in playbook or alert triggers, tags are the way to go. On the other hand, if you need to export all customers as a CSV for further processing in Excel, custom fields will be more practical. Note: custom fields cannot be used in playbook trigger filters.
# Custom Fields
Custom fields allow you to extend the information available in Skalin beyond native fields, at the account, contact, and user level. Think of them as the bridge between Skalin and your own business logic: segment customers by tier, track renewal owners, store contract-specific data — all in one place, usable in filters and playbooks.
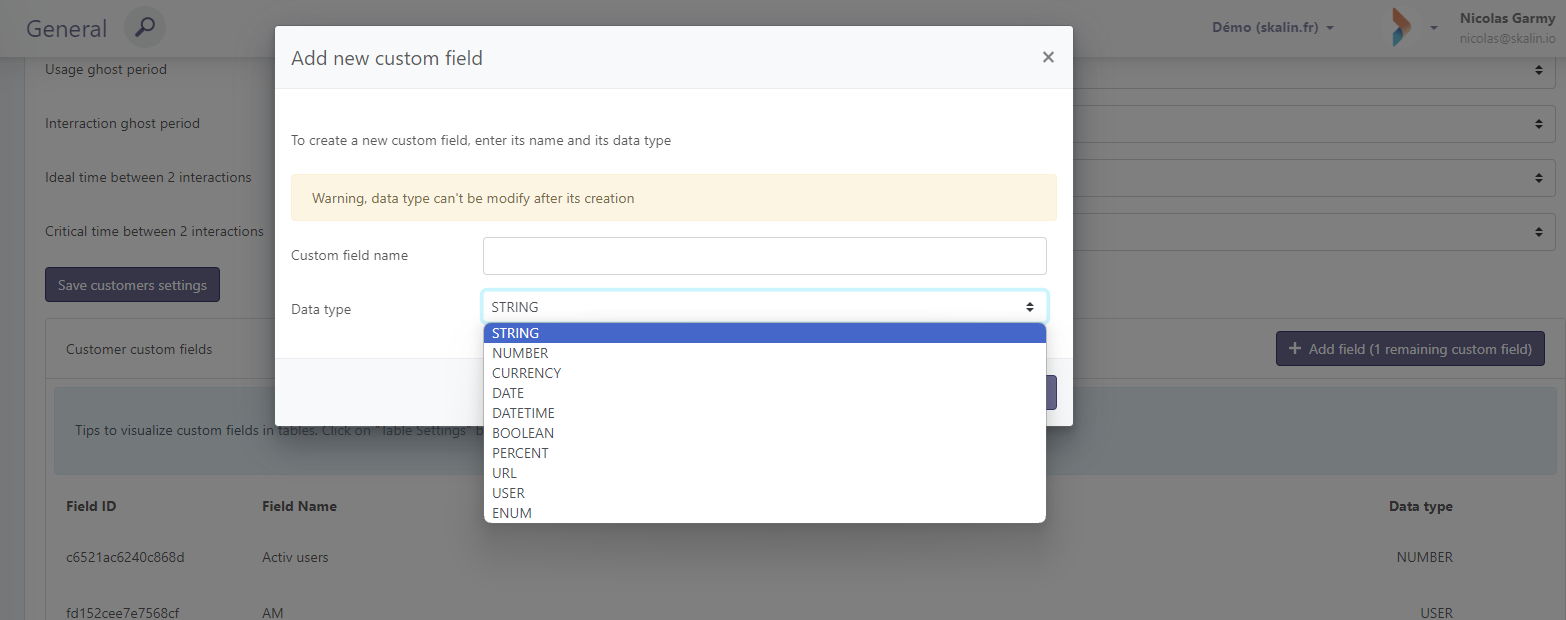
# Creating a Custom Field
Go to Settings > General > Customer Settings (or Contacts, or Users depending on the level you want), then click "Add a custom field". The number of remaining available fields is displayed.
Give your field a short name and select the appropriate type:
- String: text field
- Number: numeric format
- Currency: currency
- Date: date in DD/MM/YYYY format
- Datetime: timestamp DD/MM/YYYY hour/minute/seconds
- Boolean: YES/NO
- Percent: percentage
- URL: website URL
- User: user-type field
- Enum: dropdown list, only one value selectable at a time
- Tag: tag list, multiple values can be applied simultaneously
Once created, your fields appear in the list with a custom field ID on the left. This identifier will be useful for populating these fields via API.

Duplicates
Avoid creating custom fields that are equivalent or very close to fields already existing in Skalin, so as not to cause confusion for users and to take full advantage of the built-in logic on native fields.
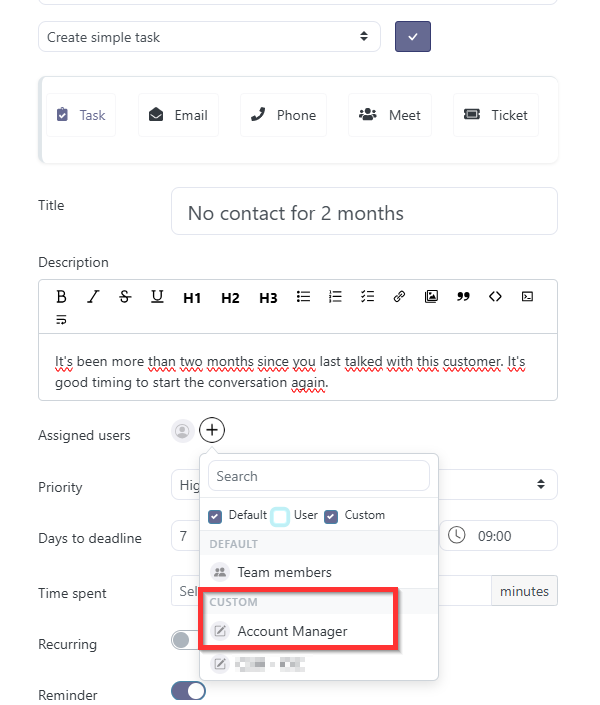
# USER-Type Custom Fields
If you create a User-type field on a customer record (for example, to record the Account Manager), you can use this information to assign tasks directly to that user via Playbooks.
Good to know
When a person is added to a User-type custom field on an account, they are automatically added to the account's team members.
Custom fields associated with users can be filled in directly from Team > My team.
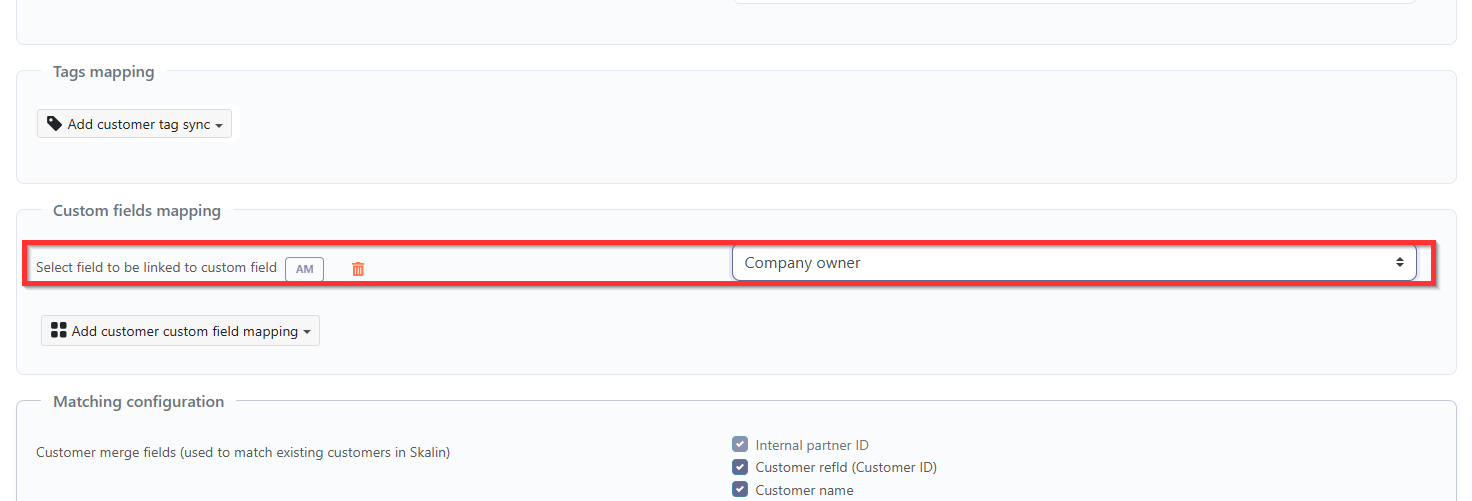
# Mapping a Custom Field with Your CRM
Custom fields can be mapped to your CRM by going to Integrations > Hub > the relevant CRM > Custom Field Mapping. Skalin fields are on the left, CRM fields on the right.